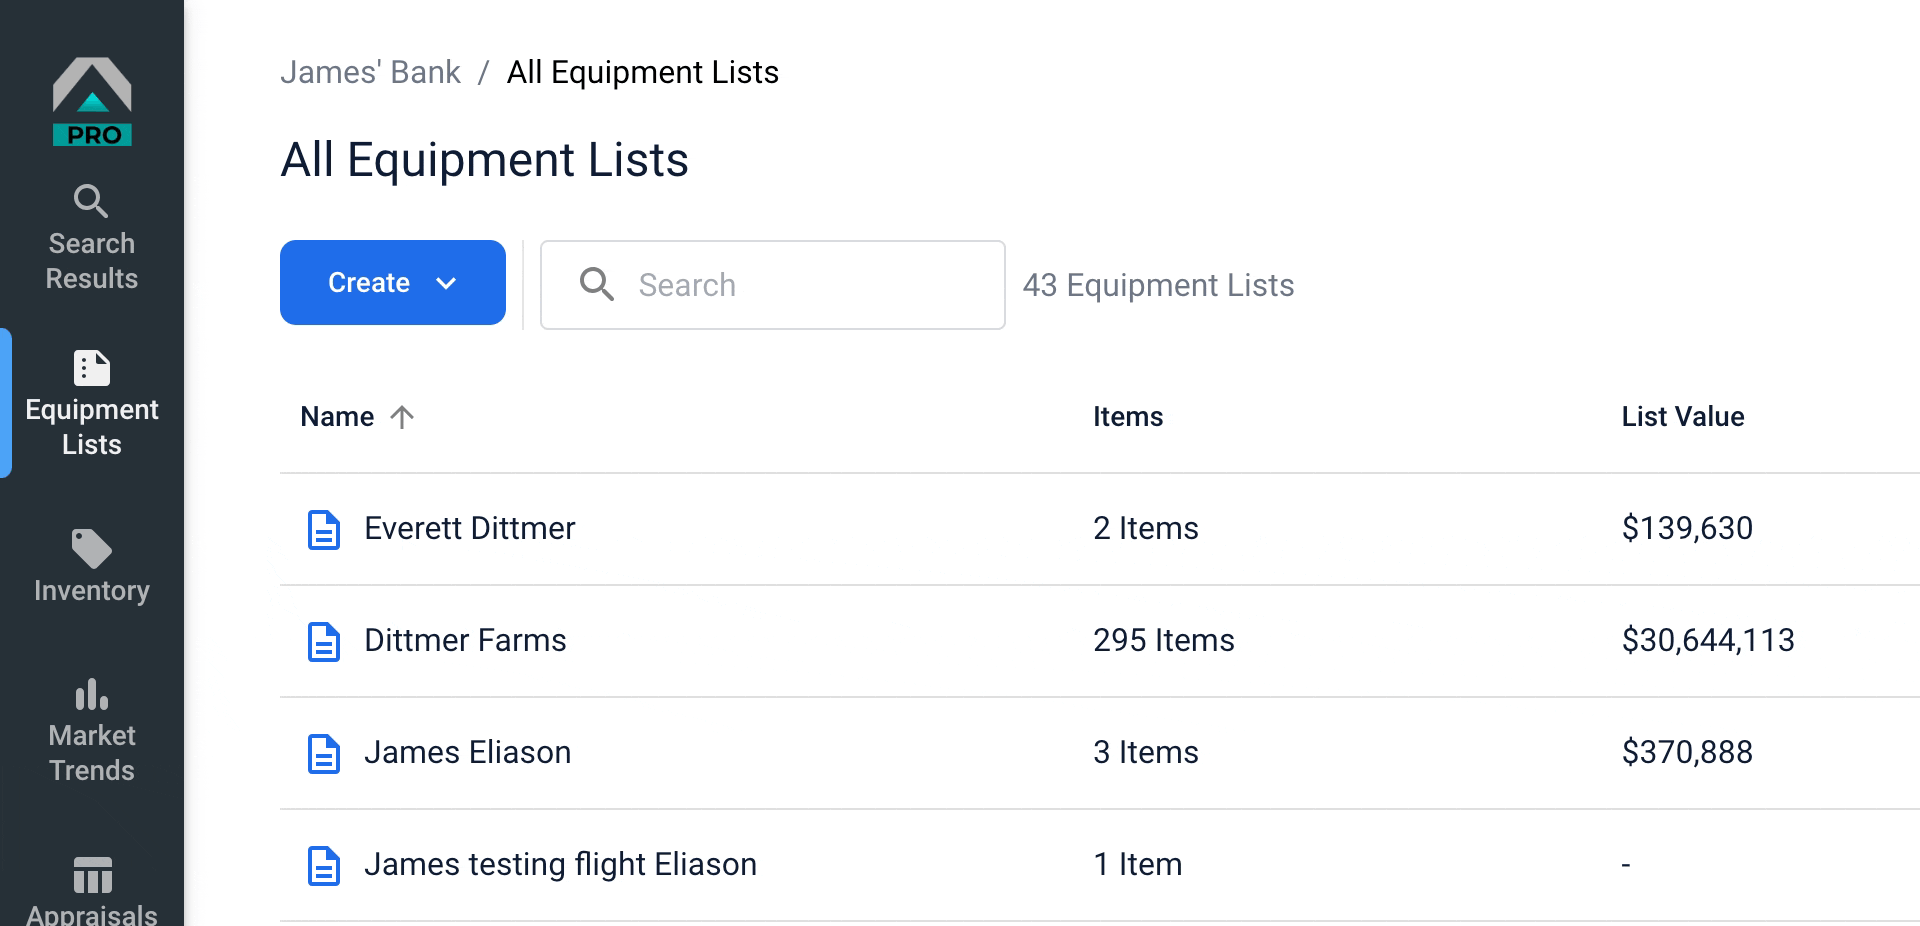
Equipment Lists in Tractor Zoom Pro brings organization and efficiency to all the inventory you are tracking. Keep all of your farmers' pieces of equipment in organized lists for continual valuation updates based on current market conditions. It also enables you to export lists for reporting purposes.
Follow the guide below to get started with Equipment Lists today.
Create Equipment List
Click Create Equipment List to begin.
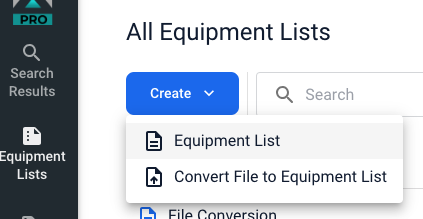
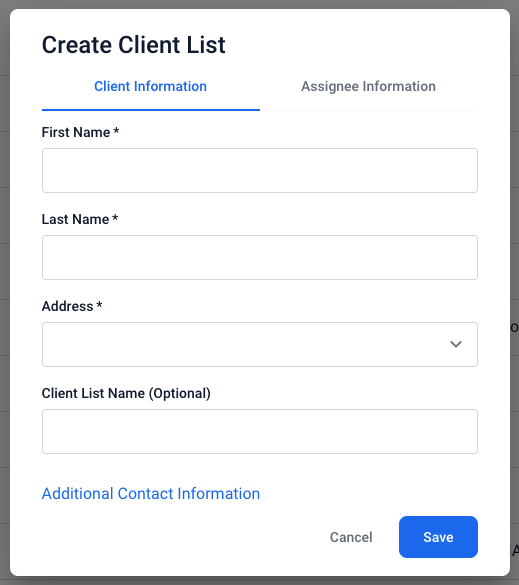
The first option in the drop down is to create an Equipment List. Click the option and input details like Client List Name and Location, which are required to save.
You may also select Convert File to Equipment List.
Once you’ve uploaded a PDF or CSV file, our system is set up to automatically convert your data into the required fields for an Equipment List.
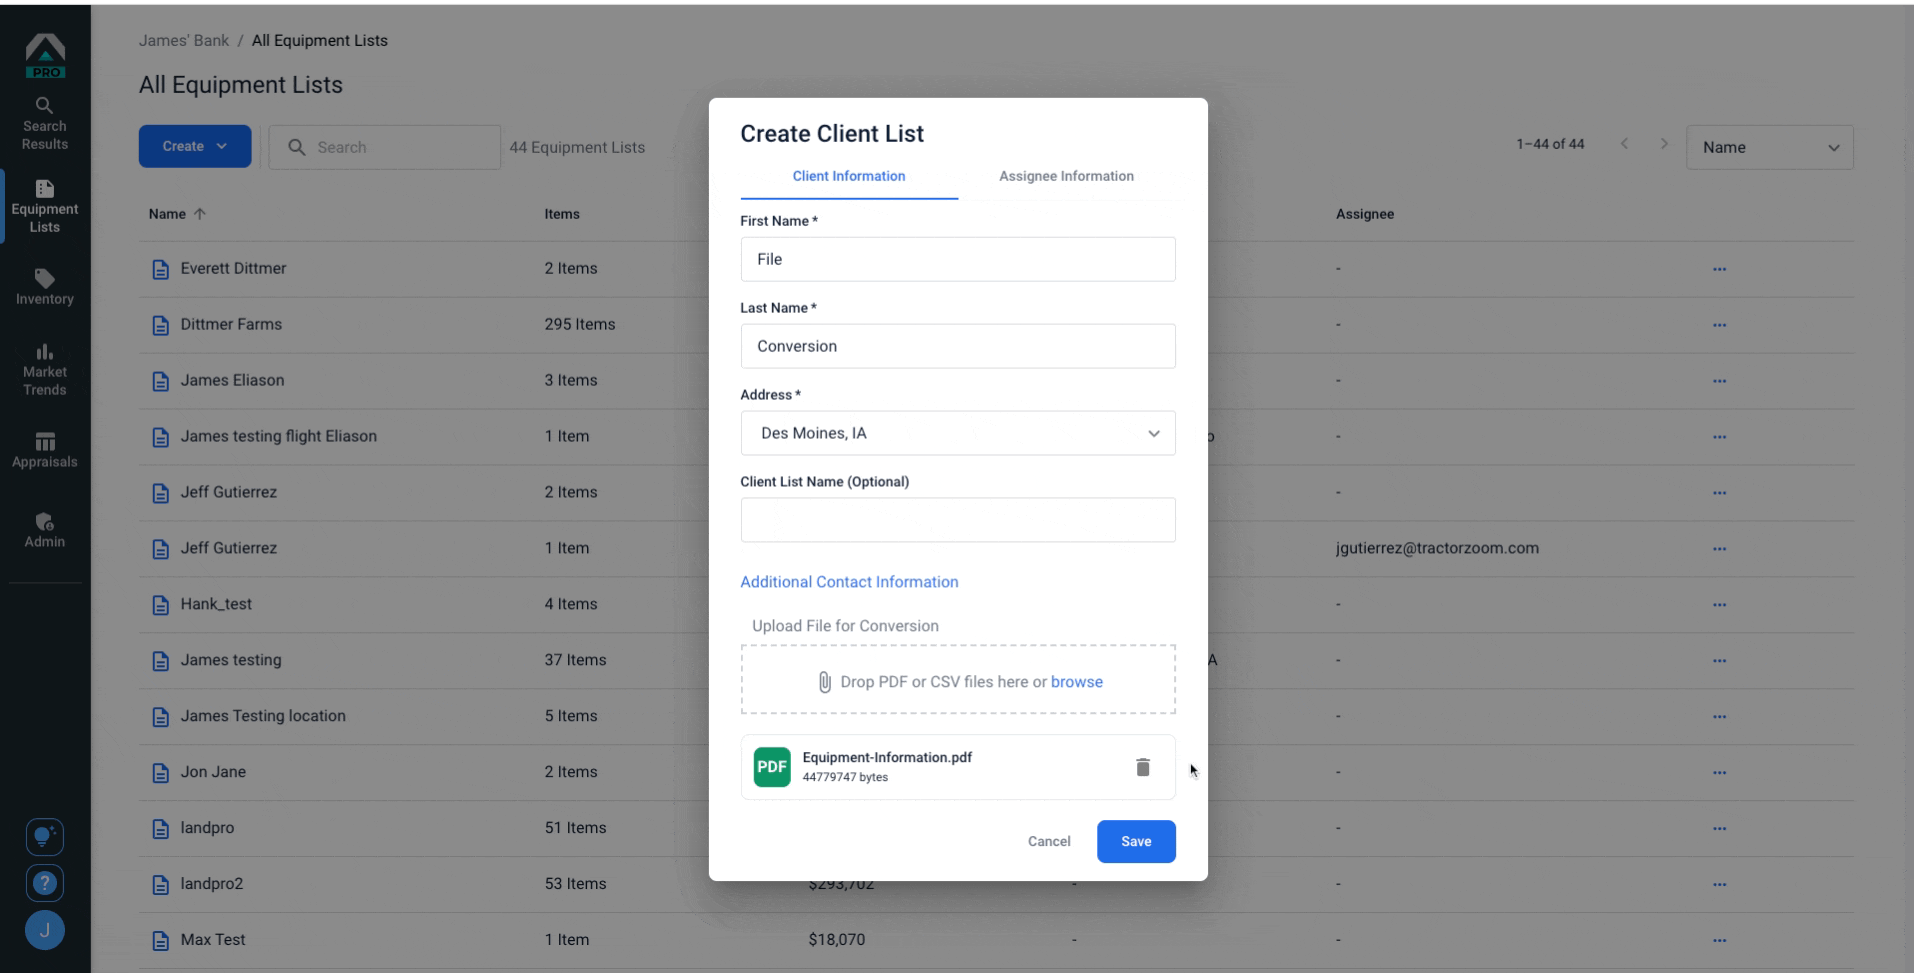
Your new Equipment List will display with a red icon and status as “In Queue” while the document is being converted. You will not be able to access the list during the conversion. Your Customer Success Manager can provide regular updates and answer any questions you may have.
The Tractor Zoom team will continue to review the files and data to ensure accuracy and completeness, which is part of our complimentary quality assurance process.
Once the conversion is complete, we will notify you via email. In Tractor Zoom Pro, your new Equipment List will display with the blue document icon and you will be able to access the list.
Add Equipment to a List
To add an Individual piece of equipment, start by clicking the blue Add Equipment button. Select Individual in the drop down. Fill out the Equipment Details and Ownership Details if you know them. Click Save.
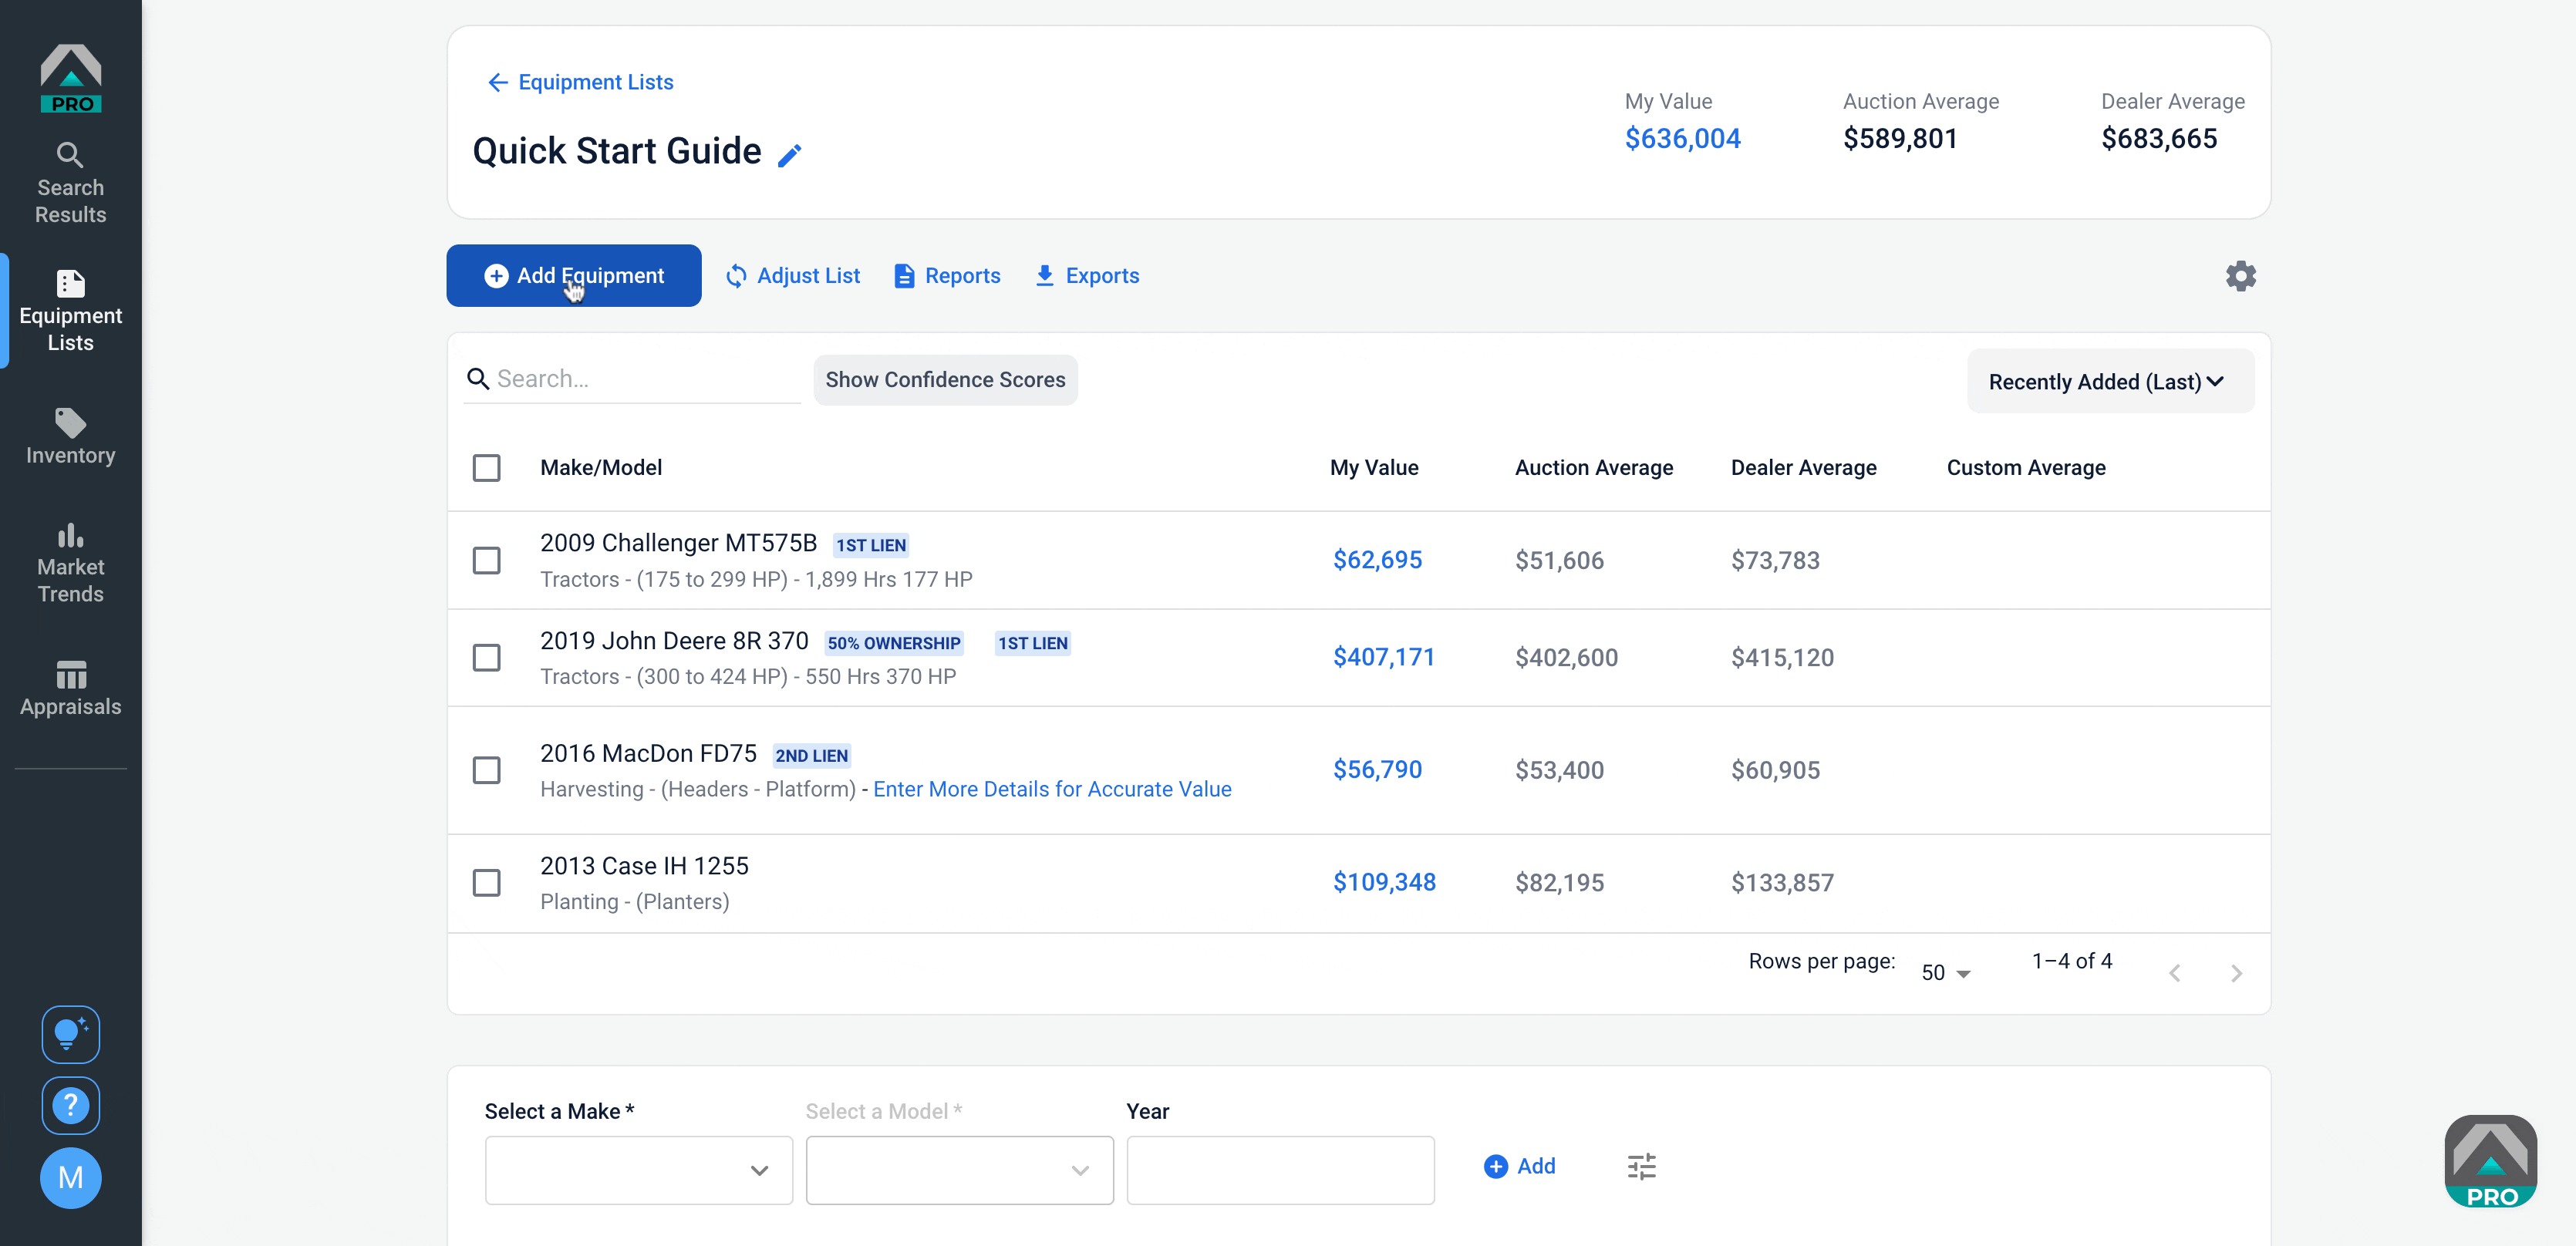
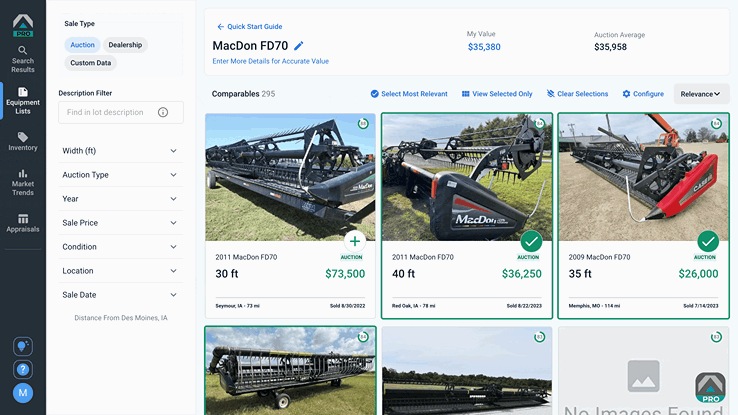
You will automatically see equipment comparables that are pre-selected. Click the green checkmark to unselect or click the green plus to add a lot to your set of comparables.
Quick Add Equipment
At the bottom of the screen is a Quick Add section. As you fill out fields, others will populate to complete the basics of the listing. More equipment details can be added later. Click Add to finish.
|
Tip: You can change the position of the Quick Add feature on your screen by clicking the settings gear icon in the upper right. You may choose to move it above or below your Equipment List or hide it altogether. |
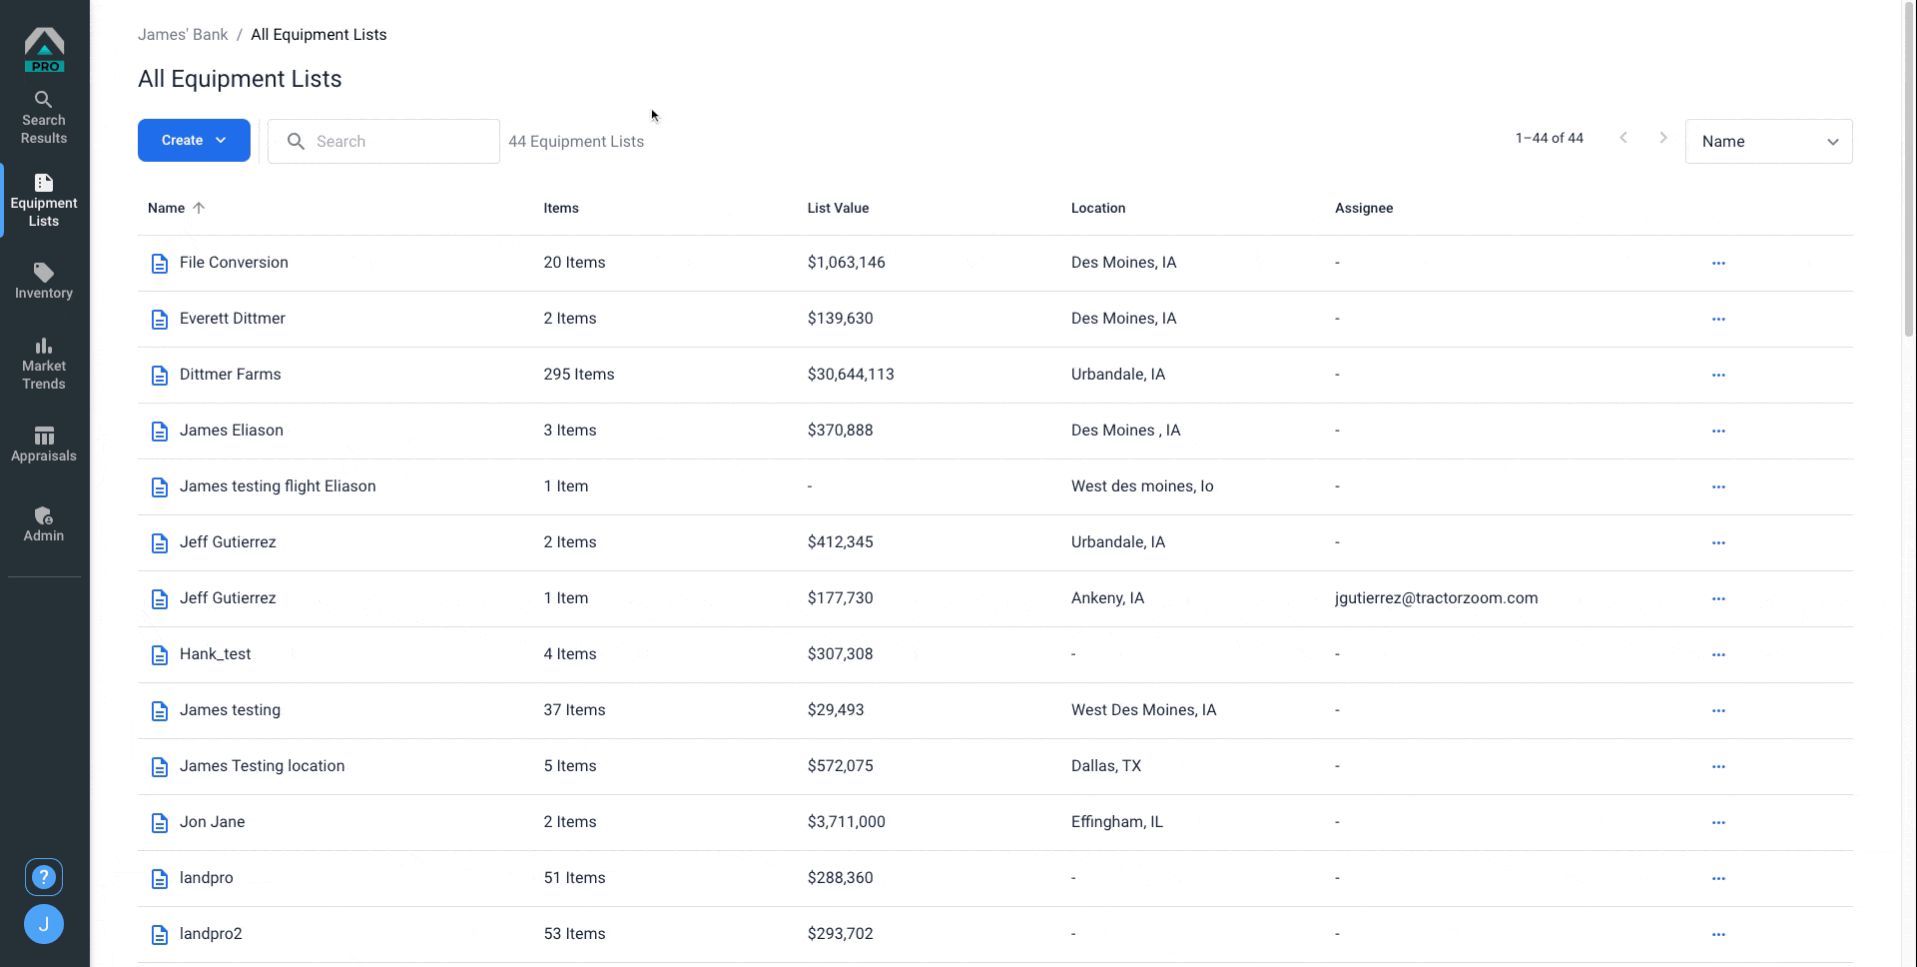
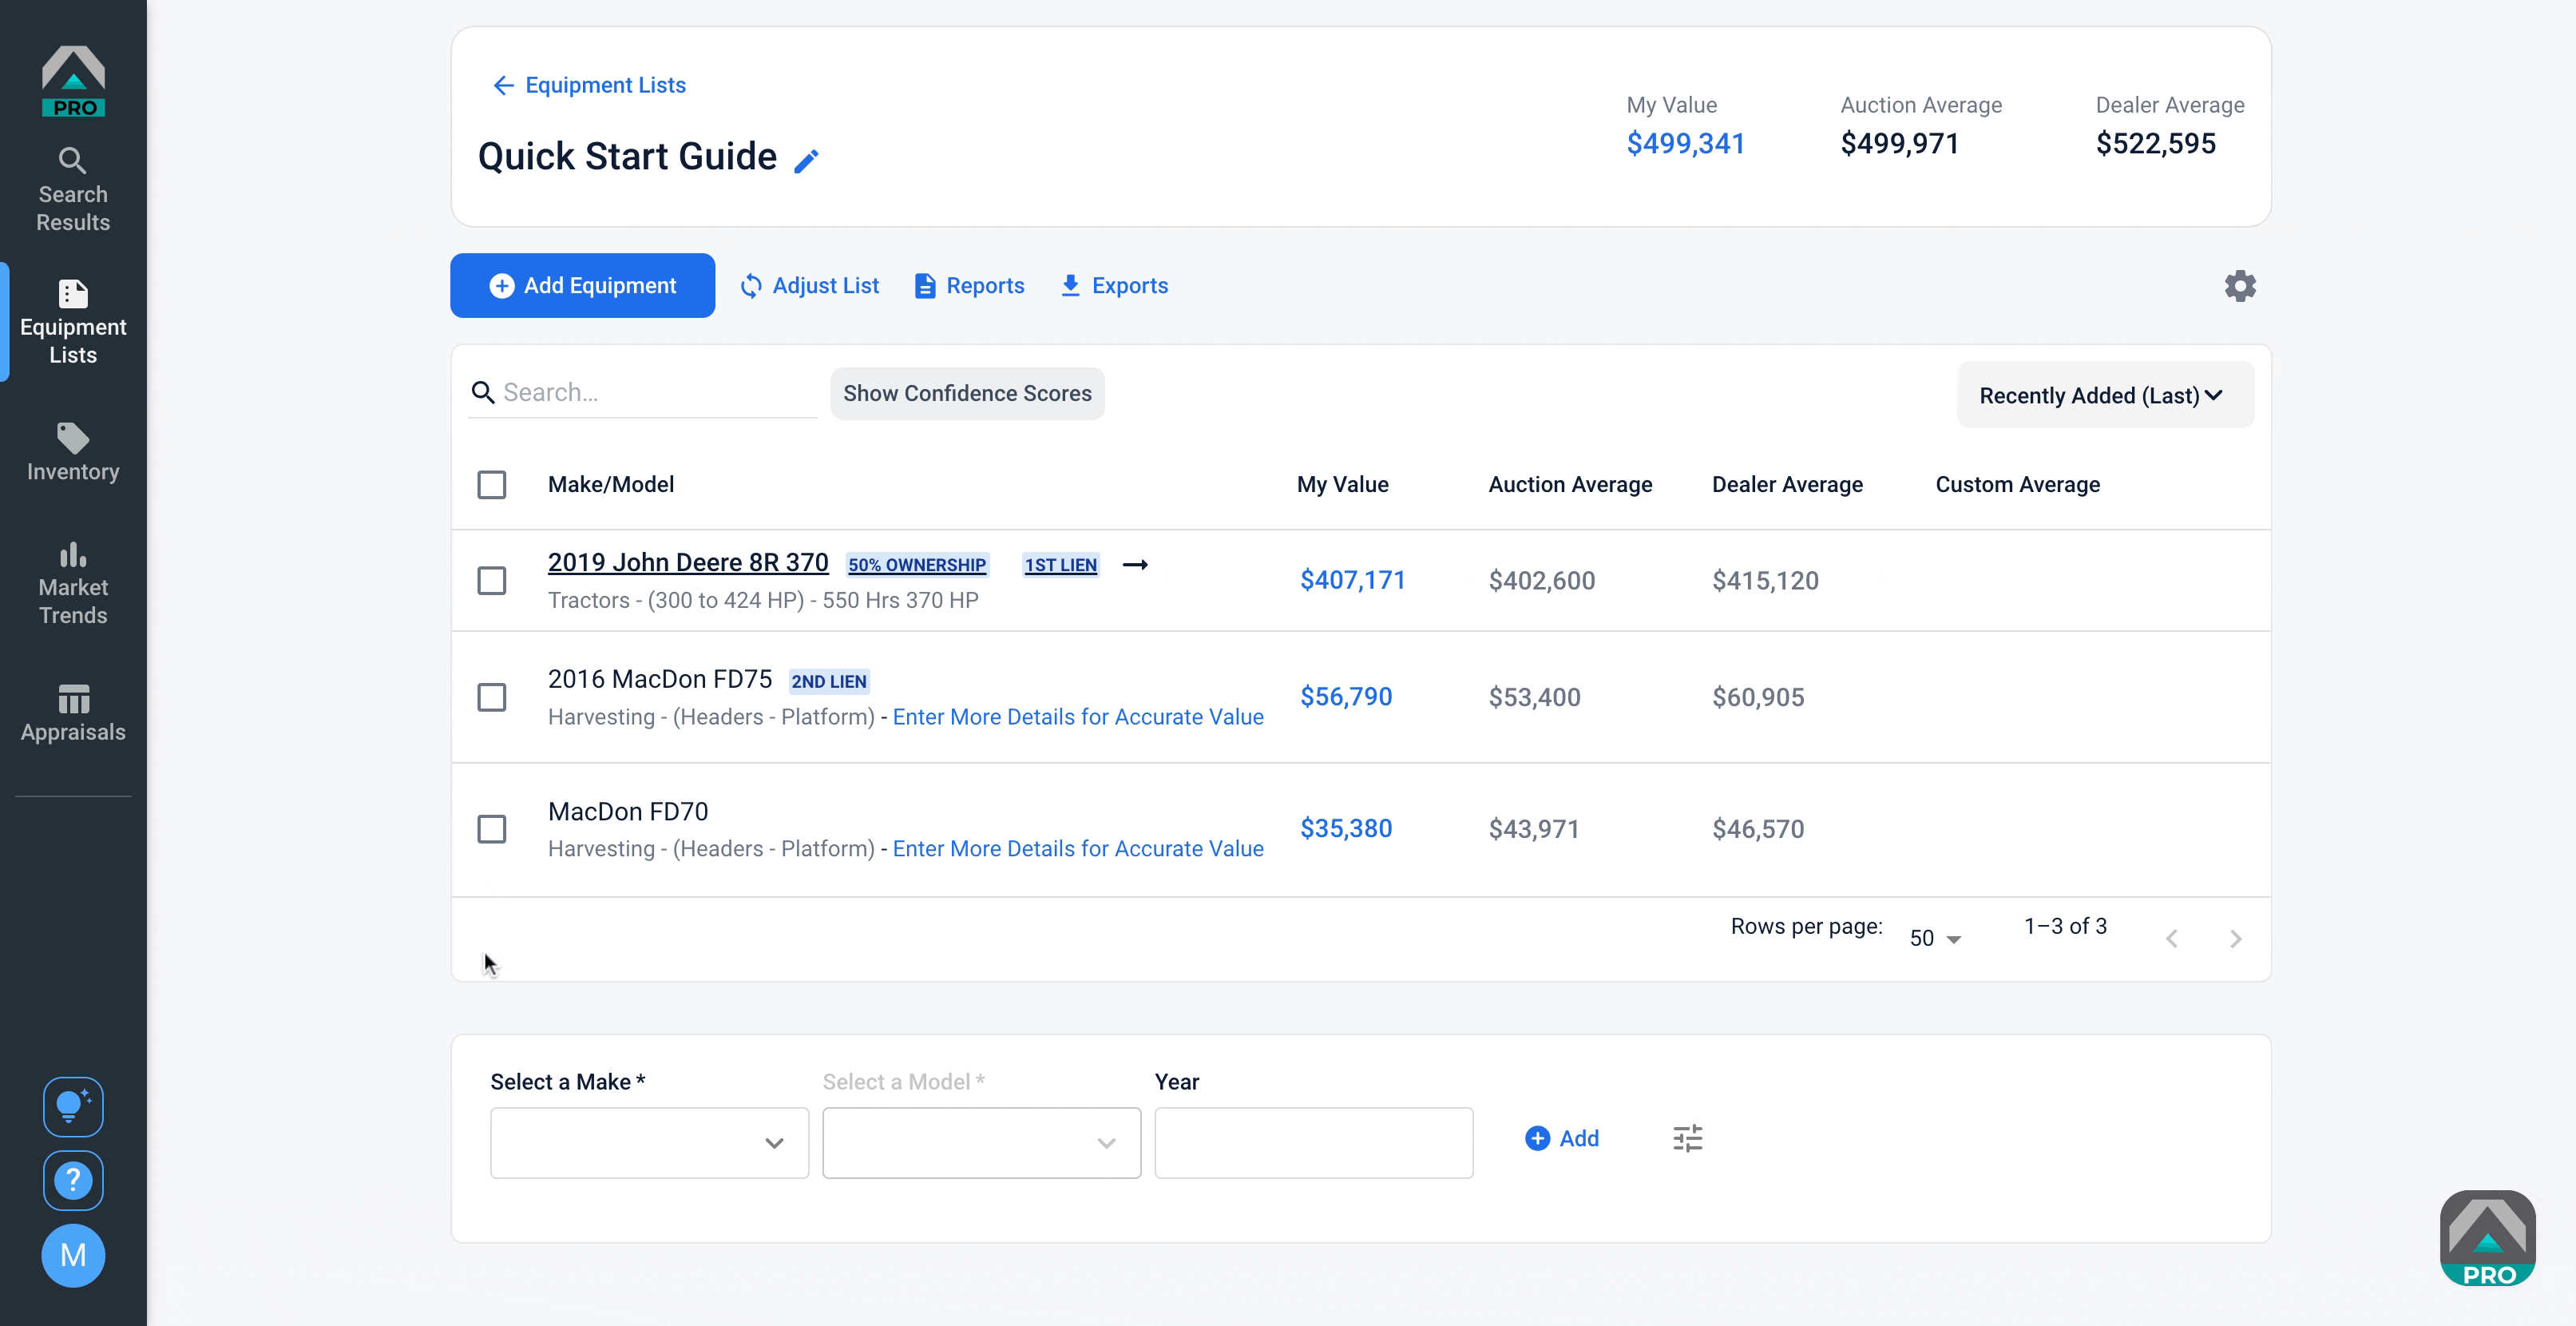
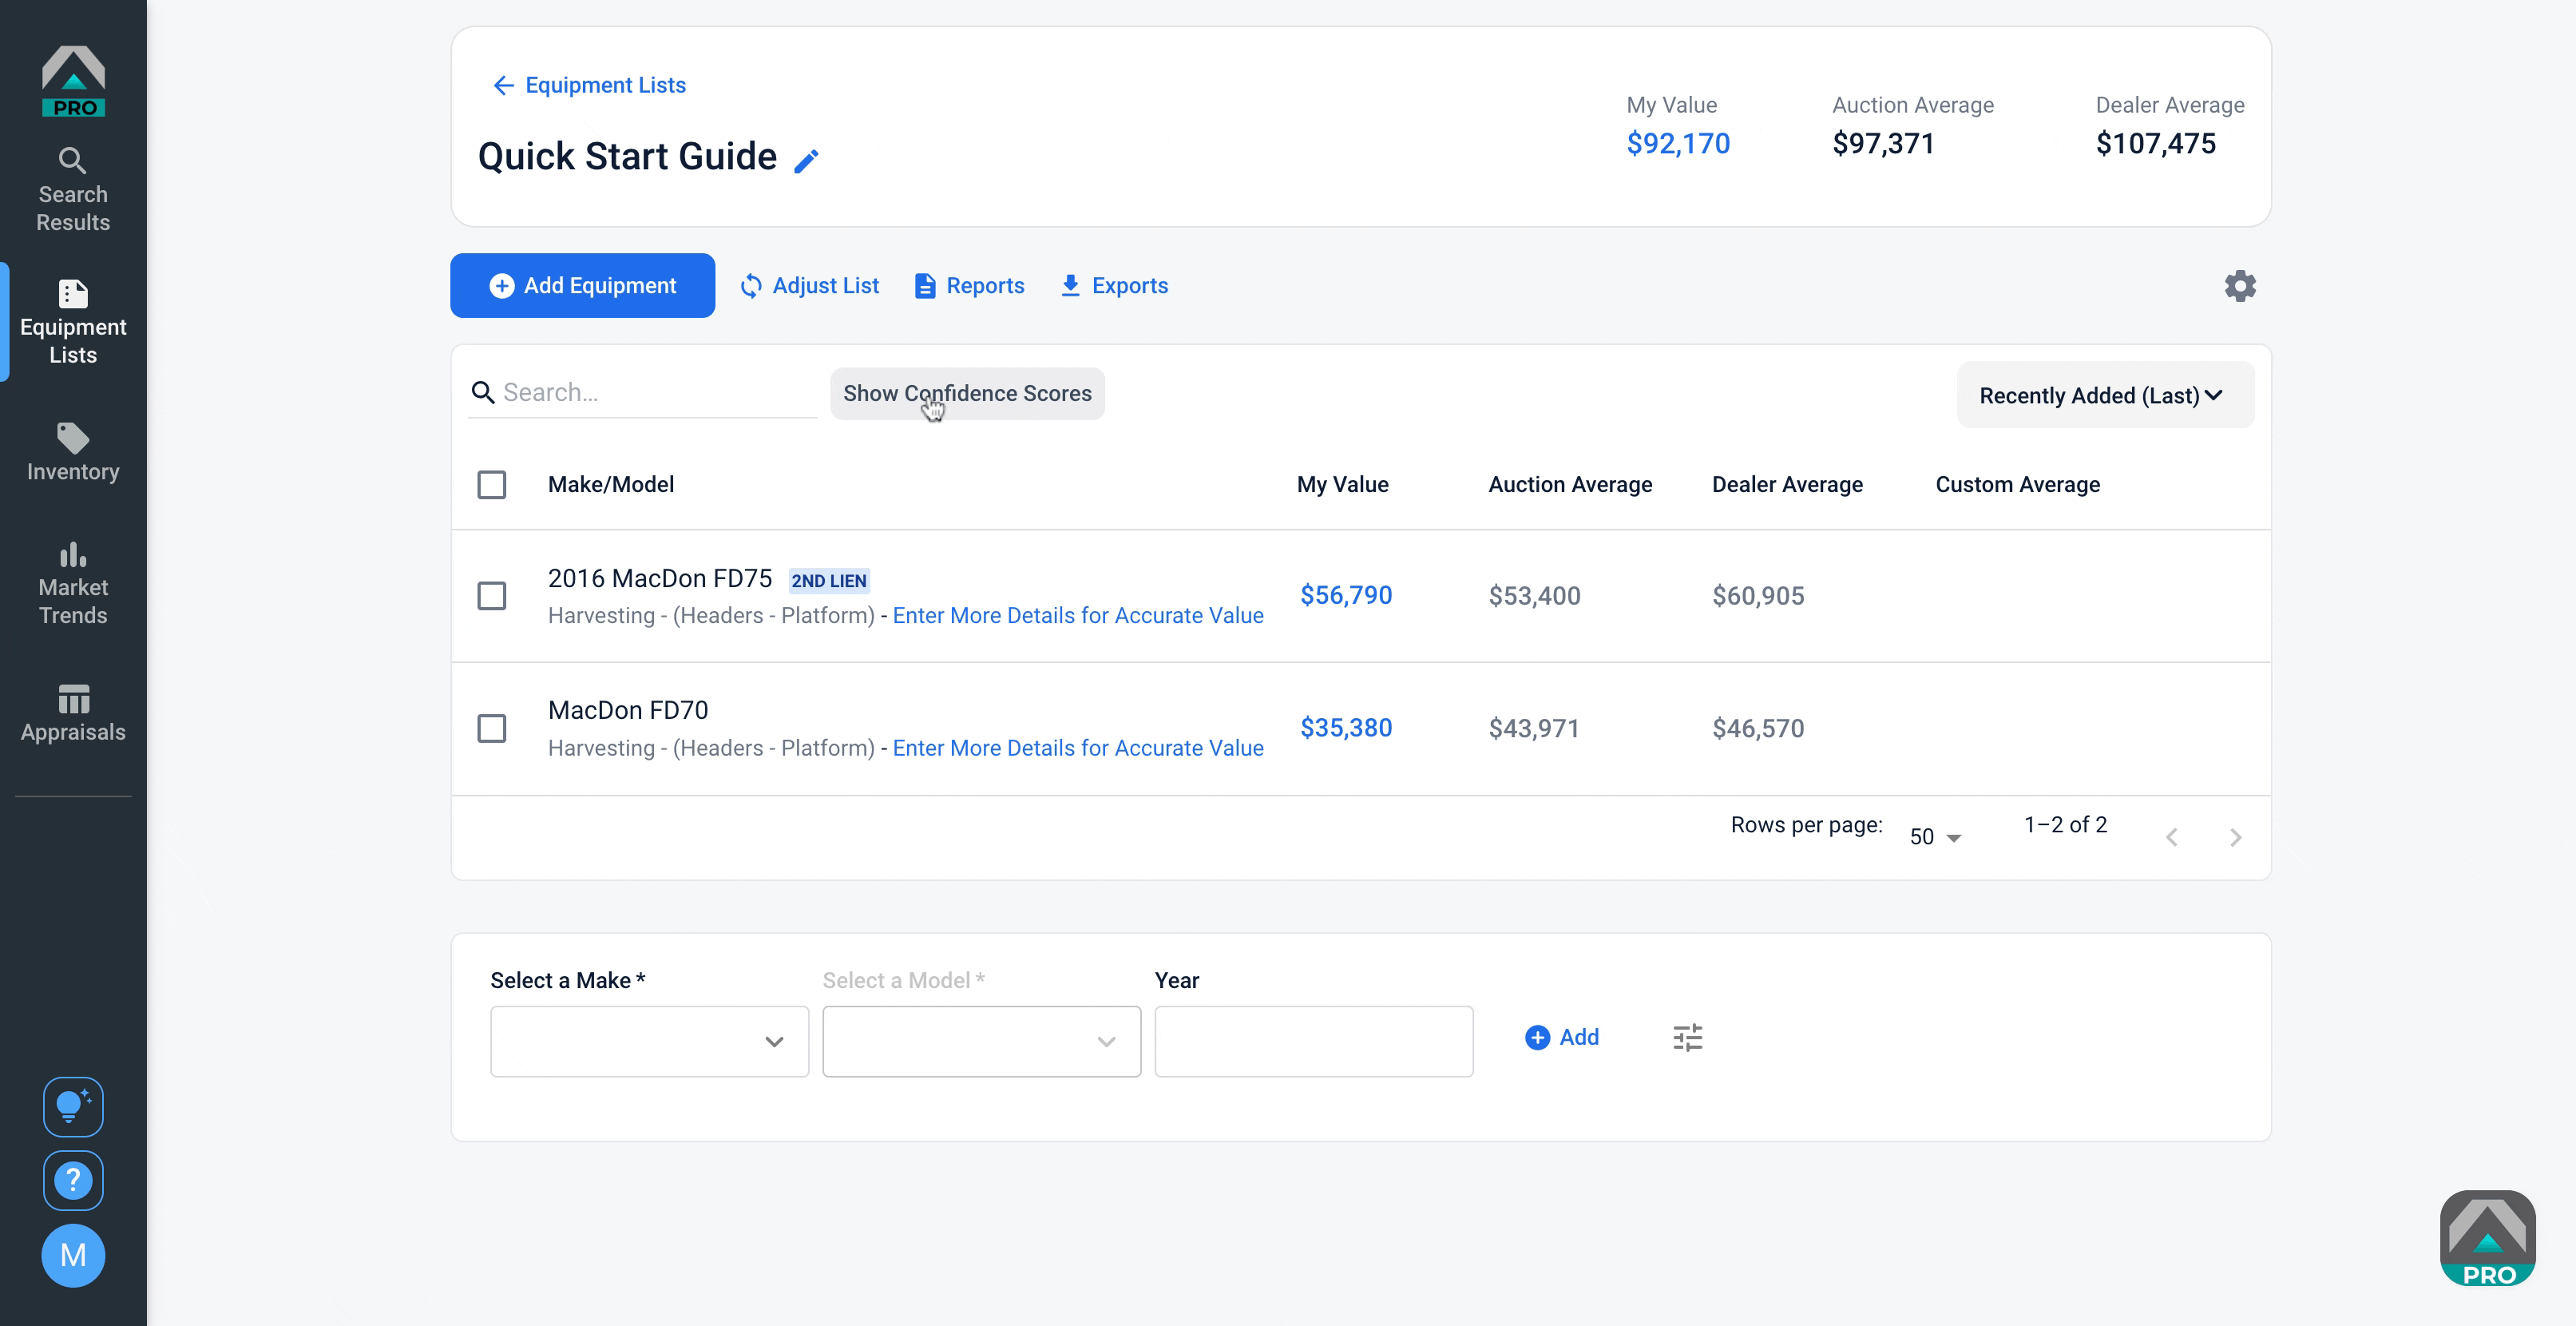
Equipment List
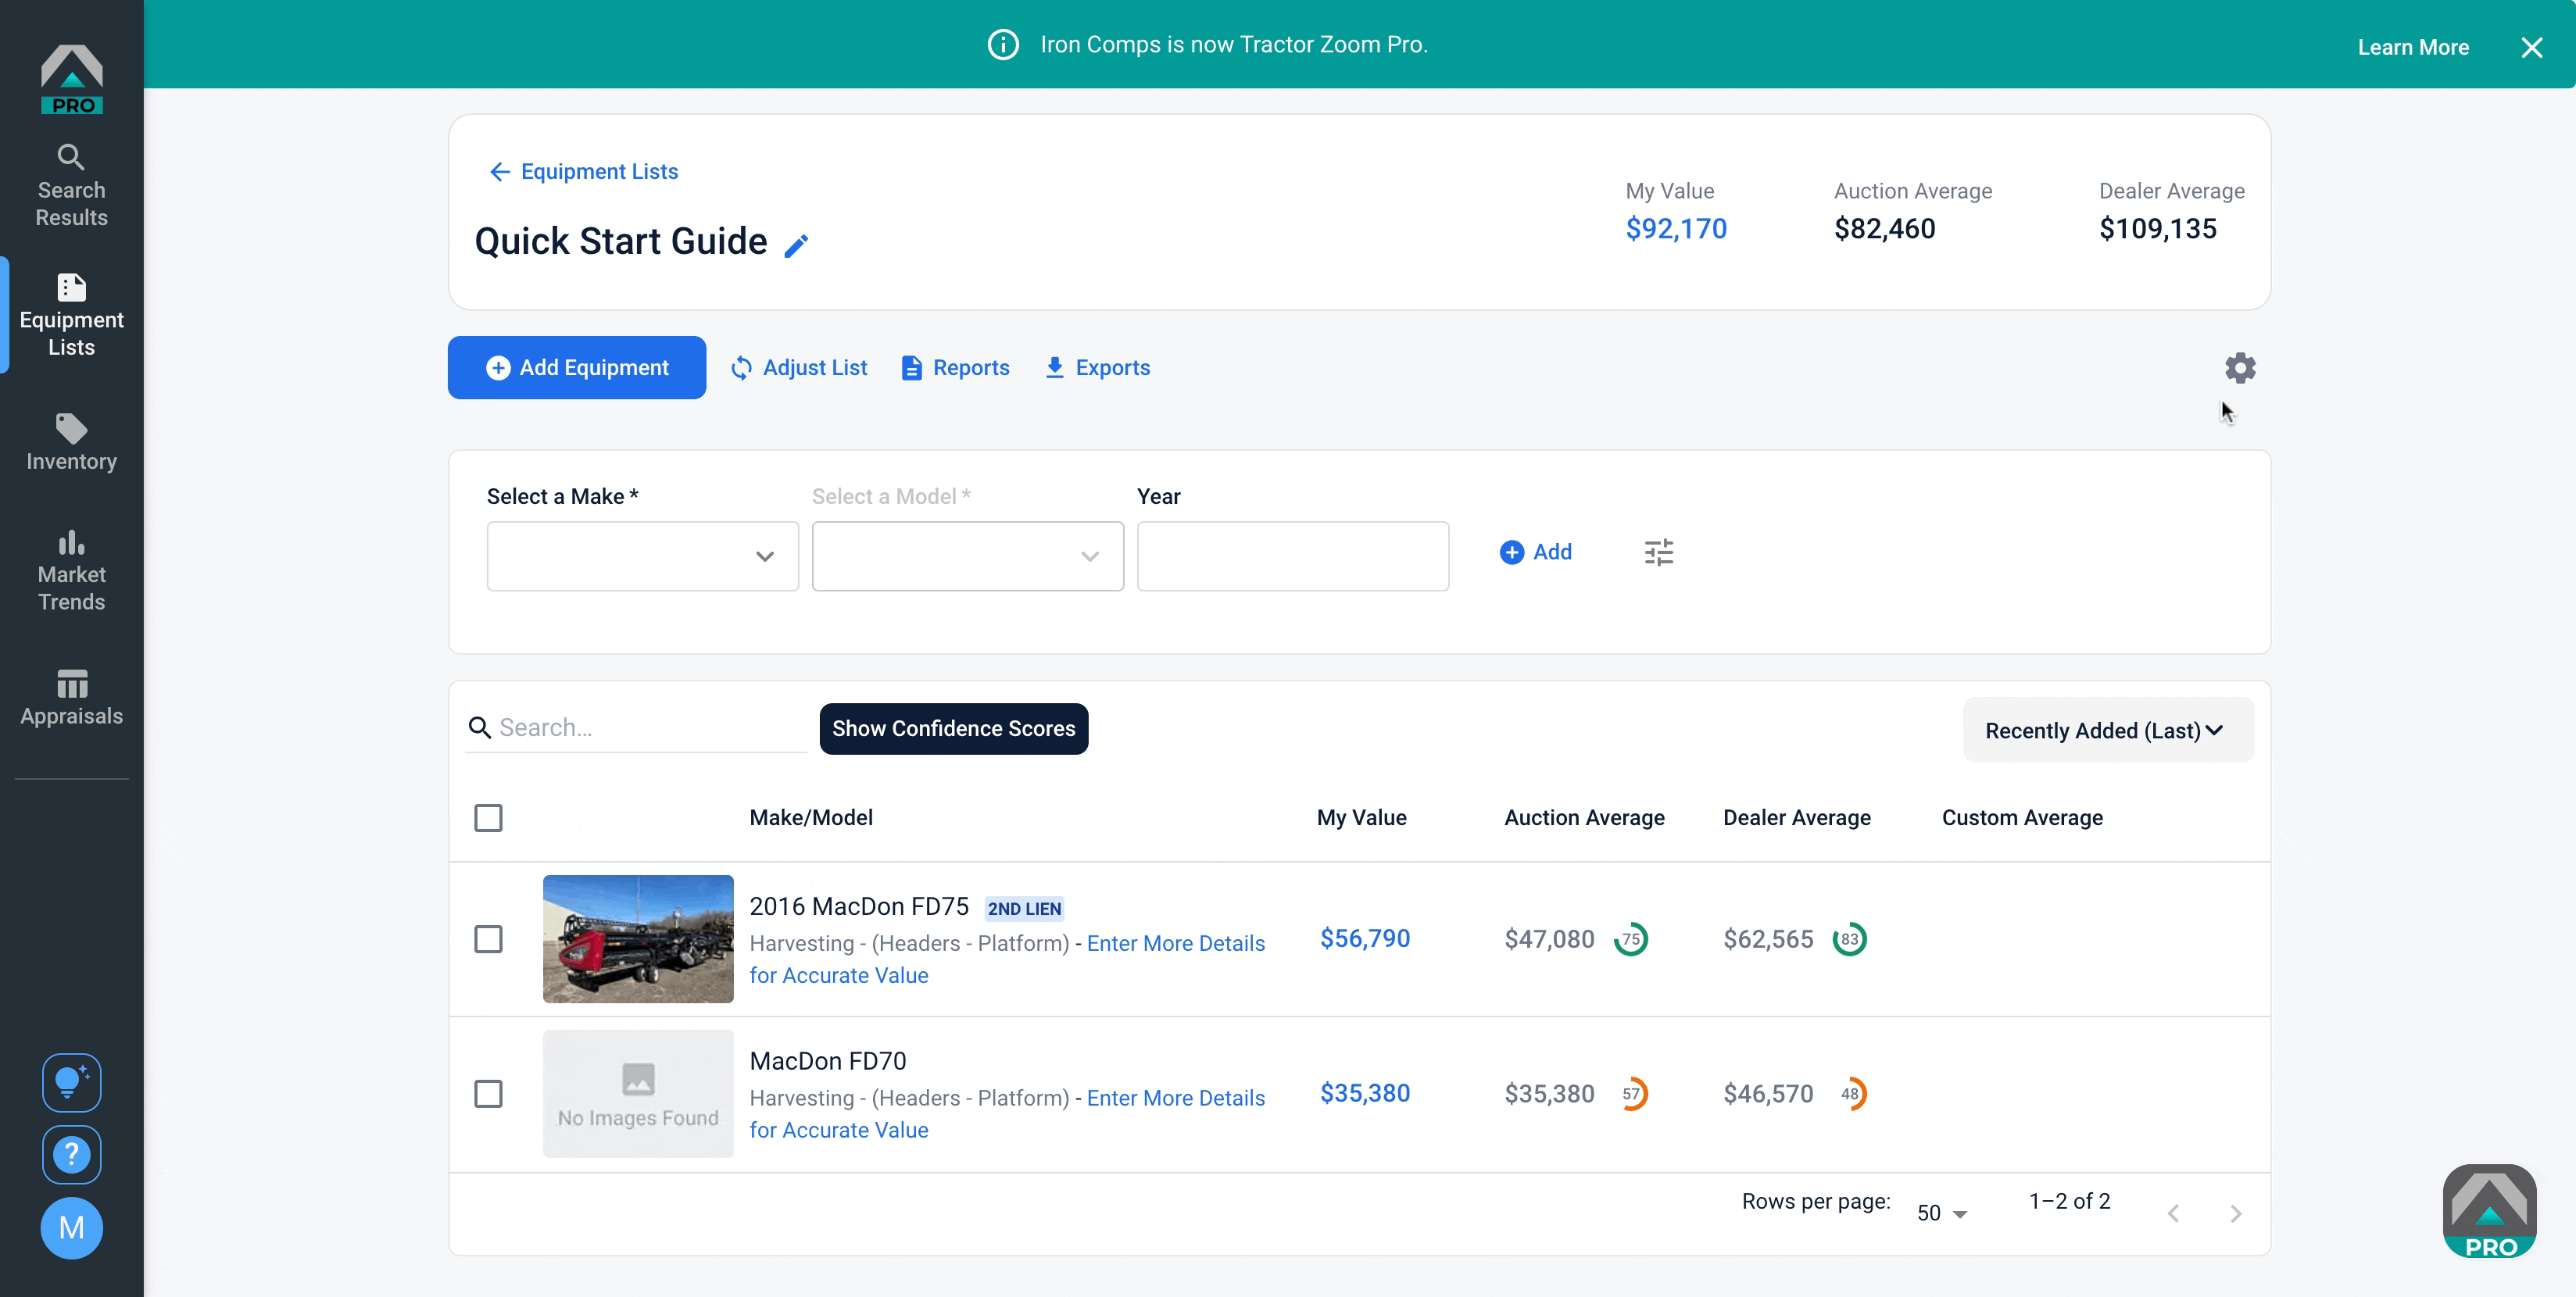
The Equipment List displays each piece you have added, plus a calculated Auction Average and Dealer Average based upon comparables on the market.
A Confidence Score will also appear, which indicates how confident we are in the calculated value of your Make/Model based upon factors like available comps, data completeness, data outliers, and more.
You may disable Confidence Scores on this screen by clicking the Show Confidence Scores button next to Search.
If you hover over an item in your list, three icons will appear that allow you to Edit, add Notes, and Delete.

The Equipment List can be sorted by category, custom qualities, recently added, Make/Model, and year.
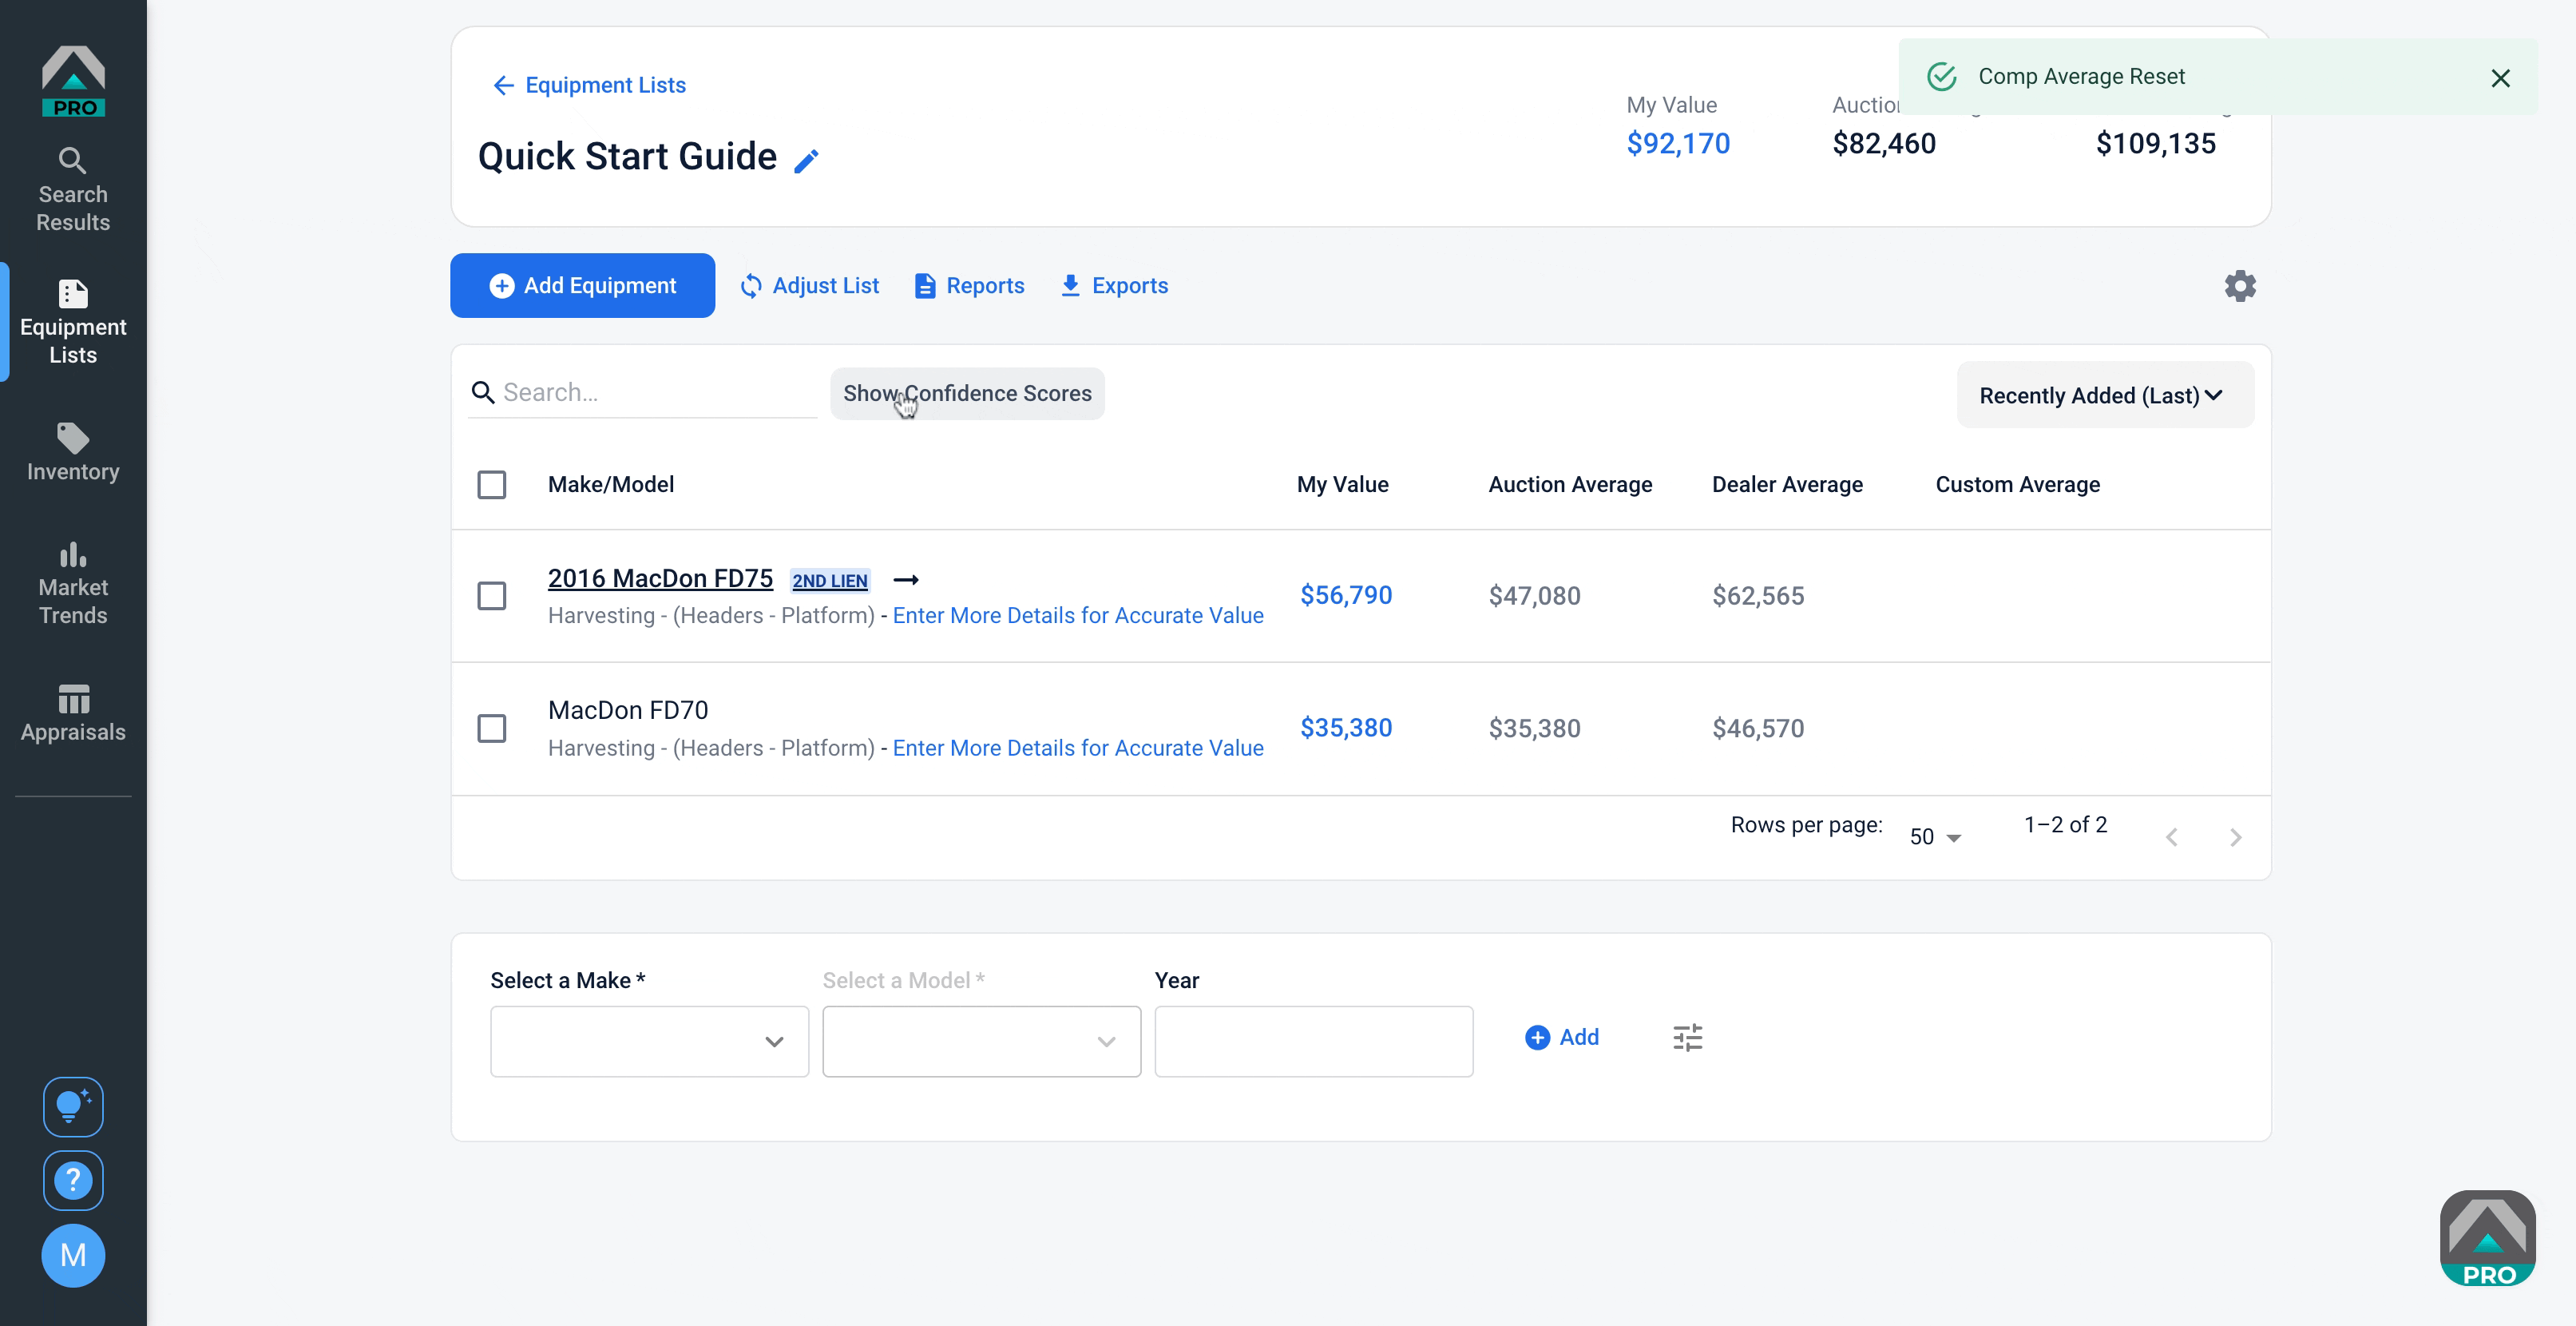
In Adjust List, you may adjust all line items by a percentage amount, clear all asset comps, and adjust your own value to a percentage of the auction or dealer average. This is especially helpful when reevaluating collateral during the next year's loan renewal season.
Clicking Reports enables you to view or save your list as a report. You may also Export your list to a PDF or CSV file with formatting options for both types.

Settings
Click the gear icon in the upper right of your screen to adjust settings beyond what’s available in the Equipment List view. This includes your contact information, list view options, Quick Add position, and more.
|
Tip: Tractor Zoom Pro keeps a record of changes you make to Equipment Lists, which is especially helpful when you revisit a list the following year. This can be accessed by clicking View Version History. |
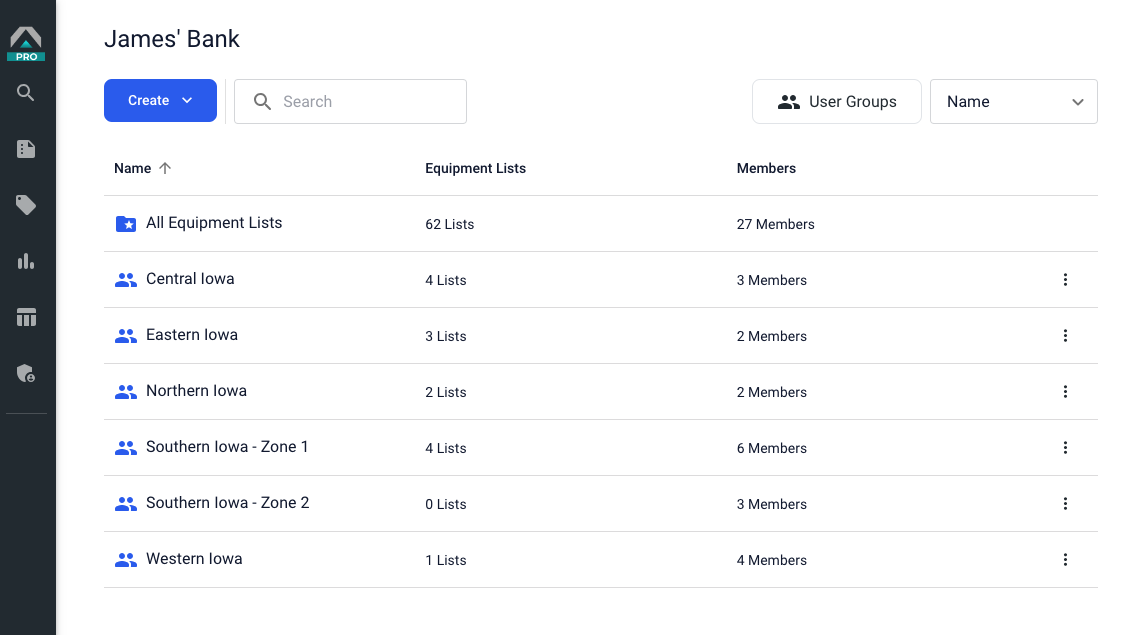
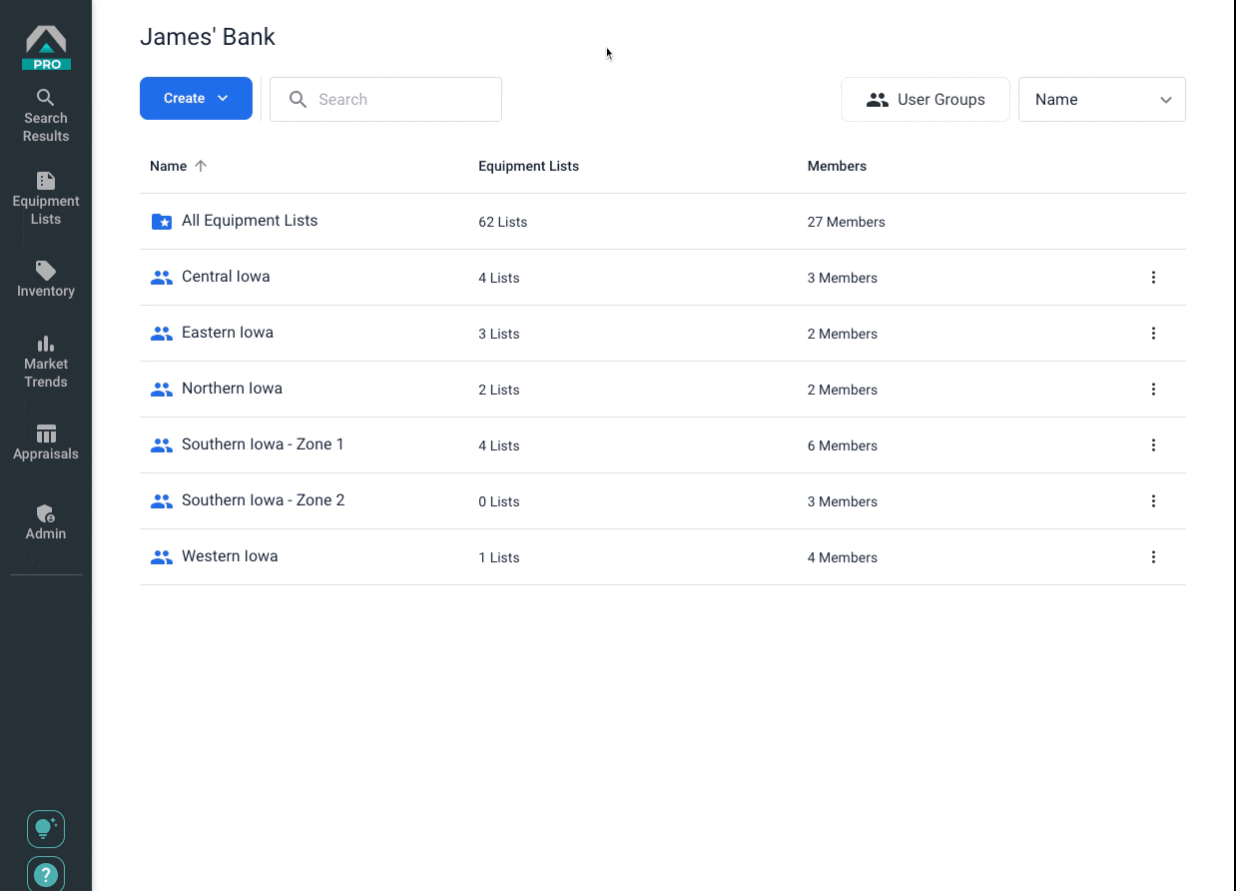
User Groups
Admins can now set group permissions in Equipment Lists that allow specific users to access lists by association, branch, location, and region. This change enables you to better organize the data and increase the security of your lists and data overall.
Non-admin users in a group may only edit the Lists associated with that group. If a non-admin user is not part of a group, they will only have the ability to view and download PDFs.
For example, an admin in Sheridan Farm Credit created user groups by region - Eastern Shore, Central Market and North Lake.
Eastern Shore users can view and edit Equipment Lists owned by other Eastern Shore user group members; they can only view and download Equipment Lists owned by Central Market and North Lake user group members.
If you have established User Groups, your Equipment List dashboard will display a list of these individual groups and one folder for “All Equipment Lists.” If you do not establish User Groups, your Lists will all be accessible as normal, listed in your dashboard.
Admins are able to create, edit, and delete User Groups. Click the User Groups button in the upper right of your screen to get started. A menu for User Groups will pop up. At this stage, you may add a Group or edit any existing.
If you plan to delete a User Group, all the equipment lists associated with that User Group will not be deleted. They will simply display in the "All Equipment Lists" folder of your dashboard.
Now it’s your turn! Start adding Equipment Lists today and when you’re ready to explore more capabilities, return here to get equipped with the skills you need to make the most of the tools available to you.
Need more help? Reach out to our Customer Success team and we’ll take care of you.